bymilliepham.com is reader-supported and contains affiliate links. This means that if you click through and make a purchase, I may receive a small commission at no extra cost to you. Learn more.
Welcome to my WP Tasty Pins review of 2024!
Struggling to get your blog's images to boost your SEO and Pinterest game? You're not alone. It's a common pain point for bloggers everywhere.
I promise, there's a solution that could turn it all around. WP Tasty Pins claims to be that very tool, and I've put it to the test.
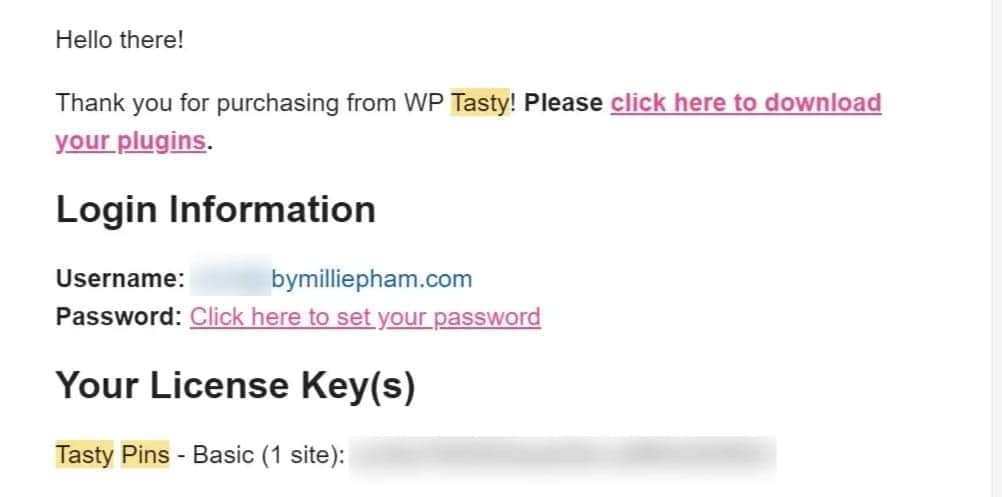
In this article, I'll share my genuine experience with WP Tasty Pins after buying and actually using this plugin in 2024.
Let's find out if this tool can help us tap into that potential.

Millie's Take
WP Tasty Pins has streamlined how I handle my blog's images, making Pinterest optimization a lot less complicated. It's a practical tool that delivers without any unnecessary frills. For anyone looking to simplify their image SEO, Tasty Pins is a solid choice.
Why is the Tasty Pin plugin important in the first place?
If you're scratching your head over the importance of the Tasty Pin Plugin, let me break it down for you. This nifty tool is crucial for anyone using Pinterest as a marketing strategy.
Here's the scoop:
Pinterest is a visual search engine, and it thrives on keywords and descriptions to help people find the pins they love.
Without the right descriptions, your pins might as well be invisible.
Now, adding these descriptions manually can be a real headache, not to mention time-consuming. That's where the Tasty Pin Plugin comes in.
It allows you to effortlessly add SEO-friendly titles and descriptions to your images in WordPress, which means they're more likely to pop up in search results.
Plus, it hides pins within your blog posts that only appear when a reader wants to pin your content. This keeps your site looking clean while still being Pinterest-friendly.
But that's not all. The plugin also helps ensure that when others pin your content, the images carry over the descriptions you've set, keeping your SEO strategy consistent and on point.
Now, you may think that with just a bit of work in editing the HTML code, you can SAVE $49 per year.
Yes, that's true, but consider this: doing that for each blog post could cost you an extra 10 minutes. Now, just imagine how many hours you waste in a year.
I mean, with that time, you could write at least 10 blog posts and potentially make 10x more money than $49.
So, investing a little in a tool like the Tasty Pin Plugin can pay off big time in the long run.
What is Tasty Pins?
Tasty Pins is a WordPress plugin that streamlines the process of making your blog posts more shareable on Pinterest. Once you install Tasty Pins, you can easily add pin descriptions to your images without touching a single line of HTML code. This is a big deal because it saves you time and hassle.

With Tasty Pins, you also have the power to control which images on your blog are pinnable and which ones aren't.
This means you can hide certain images that don't work well on Pinterest and highlight the ones that do. It's all about showcasing your best content.
The plugin includes a feature that prompts visitors to pin your images by adding a hover button to them.
This subtle cue can increase the chances of your images being shared on Pinterest.
If you're worried about non-optimized images being pinned, Tasty Pins has a solution for that too.
You can prevent these images from being pinned, ensuring that only the most Pinterest-friendly ones are shared.
Tasty Pins is fast and won't slow down your site.
It's compatible with popular page builders like Elementor, Divi, and Thrive and offers a Pinterest hover button to encourage sharing.
What I Like/Dislike About Tasty Pins
Pros
Cons
Who is Tasty Pins good for?
Tasty Pins is great for bloggers, website owners, and content creators who use images in their posts and want to improve their presence on Pinterest. It's especially useful for:
- Food bloggers: They often rely on Pinterest to drive traffic to their recipes and can use Tasty Pins to ensure their images are shared with the right descriptions.
- DIY and craft bloggers: For those who share tutorials and projects, Tasty Pins can help their content reach a wider audience on Pinterest.
- Fashion and lifestyle bloggers: These creators can use Tasty Pins to highlight their photography with compelling pin titles and descriptions.
- Photographers and artists: Professionals who want to showcase their work on Pinterest while maintaining control over how their images are described and shared.
- E-commerce site owners: They can use Tasty Pins to promote their products on Pinterest and drive traffic back to their product pages.
- SEO-focused site owners: Anyone who wants to optimize their images for search engines while also making them pinnable will find Tasty Pins beneficial.
Tasty Pins Review: Features Breakdown
Here are the key features of Tasty Pins in simple bullet points:
1. Set Pinterest Titles & Descriptions
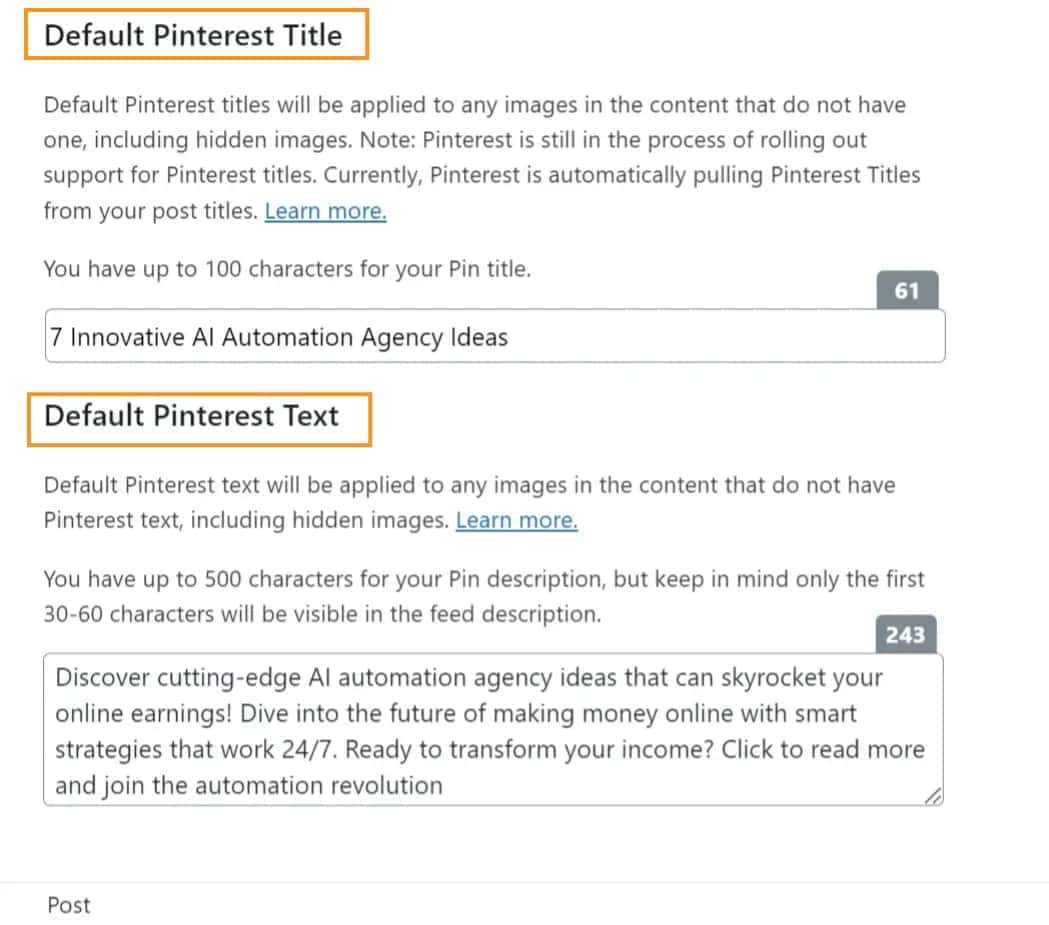
With Tasty Pins, you can set Pinterest titles and descriptions for your images right when you upload them to your WordPress site.
No more jumping through hoops or dealing with confusing code.
Just type in your description, and Tasty Pins takes care of the rest, making sure it's attached to the image whenever it gets pinned.
This means your pins are always dressed for the occasion, with keyword-rich descriptions that tell your story and help you show up in searches.
It's a simple step that can make a big difference in how your content performs on Pinterest.
And once it's set up, you don't have to think about it again. Tasty Pins handles it all, letting you focus on creating content that your readers will love and want to share.
2. Hide Pinterest-Specific Images
When you're sprucing up your blog, you want it to look neat and inviting, right?
But sometimes, you have these big, beautiful images that are perfect for Pinterest but might not fit in with your page design.
For me, it's roundup posts like "7 Best Pinterest Tools" that can generate my affiliate commissions, and I certainly don't want a large image distracting my readers from making a purchase.
That's where this feature of Tasty Pins comes in super handy.
With just a couple of clicks, Tasty Pins lets you tuck away those Pinterest-ready images on your blog posts.
They won't show up as you scroll through the page, keeping your layout sleek and tidy.
But when someone wants to pin something from your site, those hidden images pop up as options, ready to make a splash on Pinterest.
This means you get the best of both worlds: a clean blog design for your visitors and those pinnable images you've crafted, ready to go viral on Pinterest.
It's a simple trick that keeps your site looking professional while still rocking the Pinterest game.
3. Disable Pinning on Certain Images
When you're putting together a blog post, you've got some images that are just there to make the post look good.
They're not really meant for sharing on Pinterest.
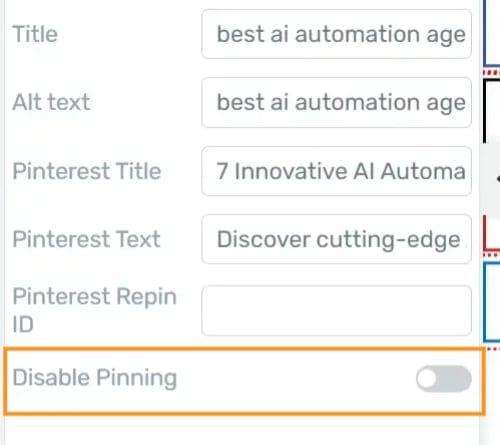
With this feature, you can pick and choose which images on your blog can be pinned and which ones can't.
This way, you guide your readers to pin only the best images that will represent your content well on Pinterest.
It's super easy to use, too. You don't have to mess around with any complicated settings.
Just click a button, and you're done. Your readers get to pin the good stuff, and your blog stays looking sharp.
4. Add a Hover Button on All Images
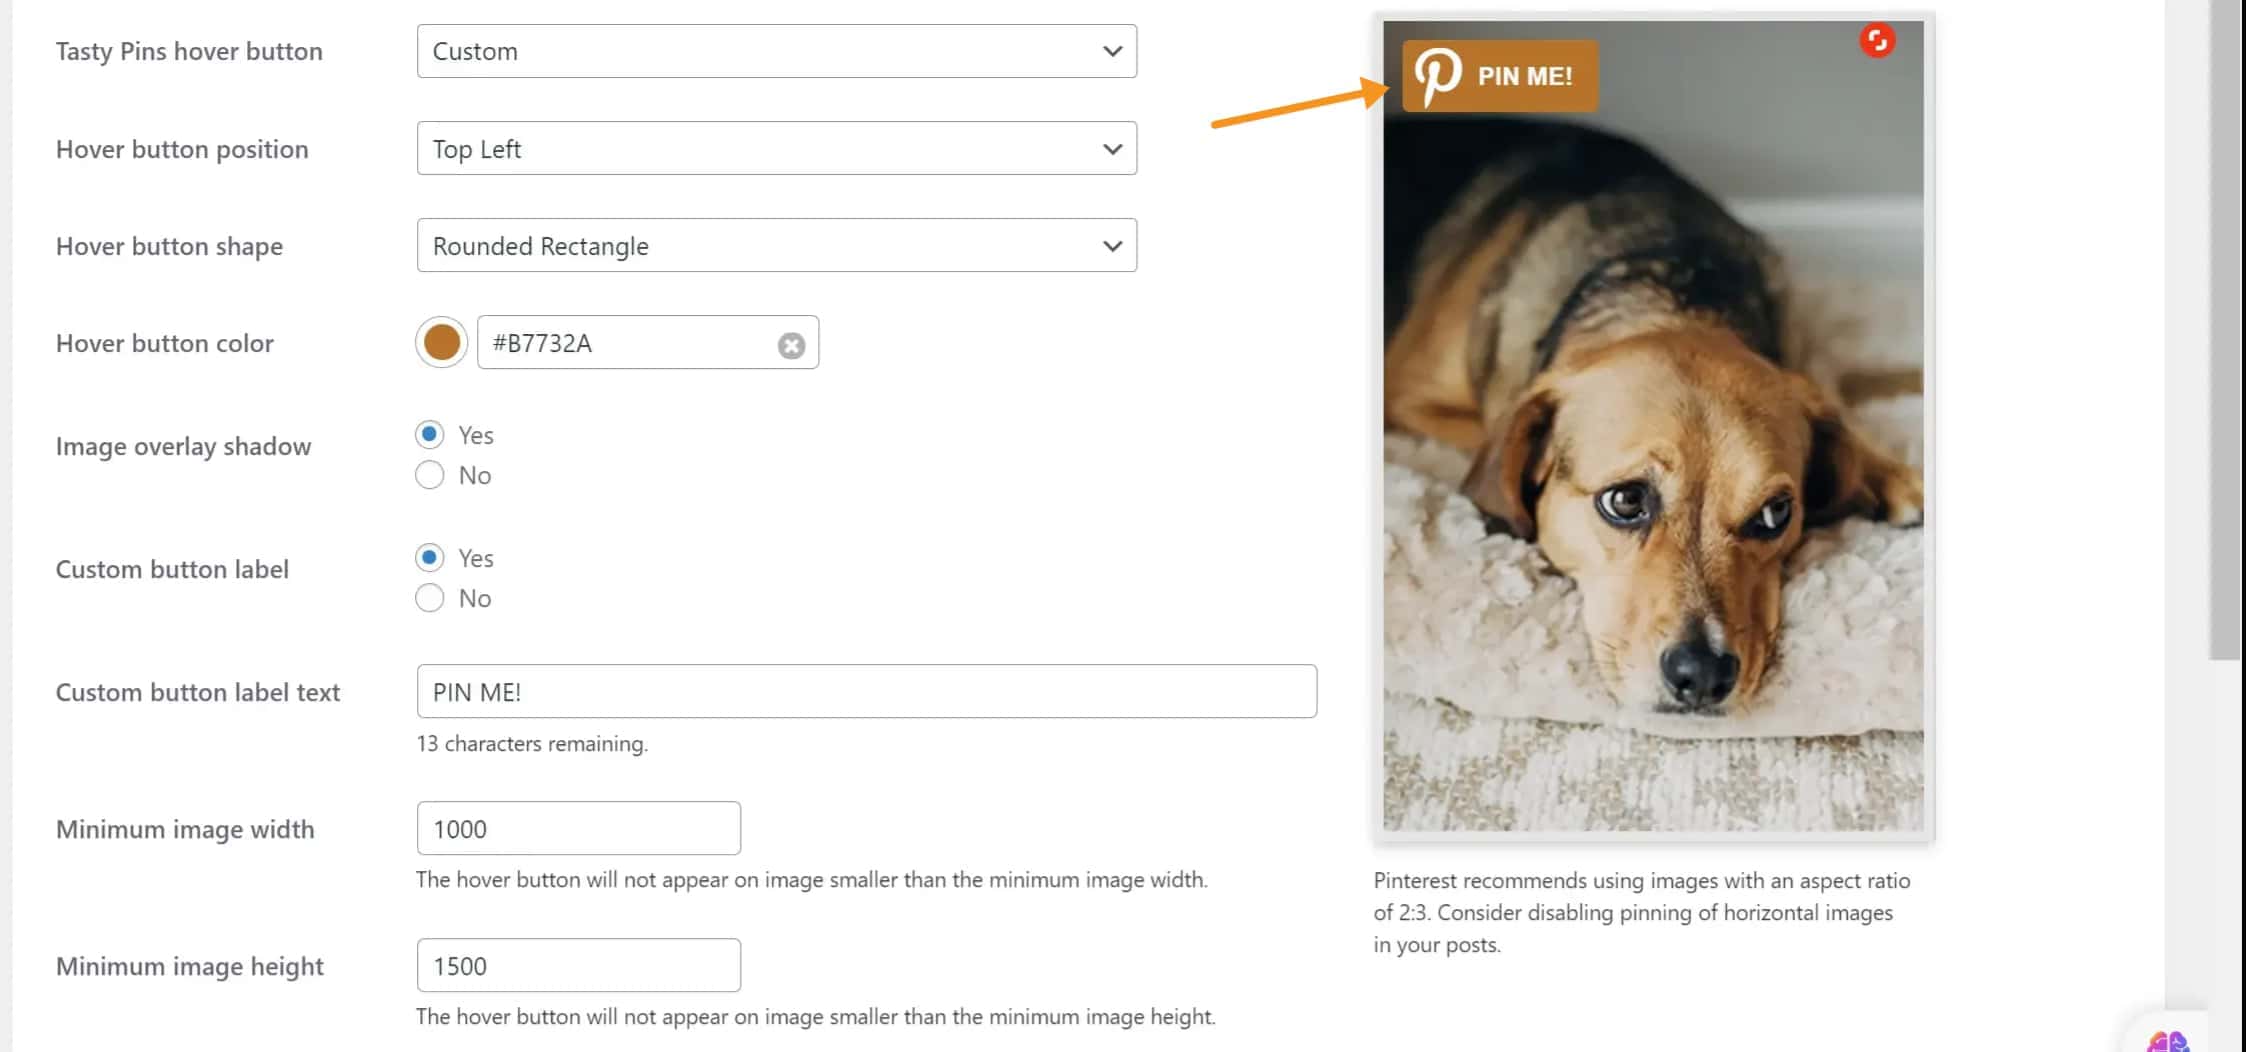
You want to make it super easy for people to share them on Pinterest. That's where adding a hover button to your images makes a big difference.
Tasty Pins lets you put a Pinterest save button, also known as a hover button, right on top of your images.
The cool part is that you can customize this button to fit the look of your WordPress theme by:
- Choose a color that matches your site
- Add a shadow for some depth
- Or even change the text that appears on the button.
But don't worry about it getting in the way of smaller pictures. You can set minimum sizes, so the hover button only shows up on bigger, pinnable images.
This means it won't clutter up your design on smaller images, but it'll be right there on the larger ones, ready to help boost your Pinterest presence.
5. Pinterest Follow Box
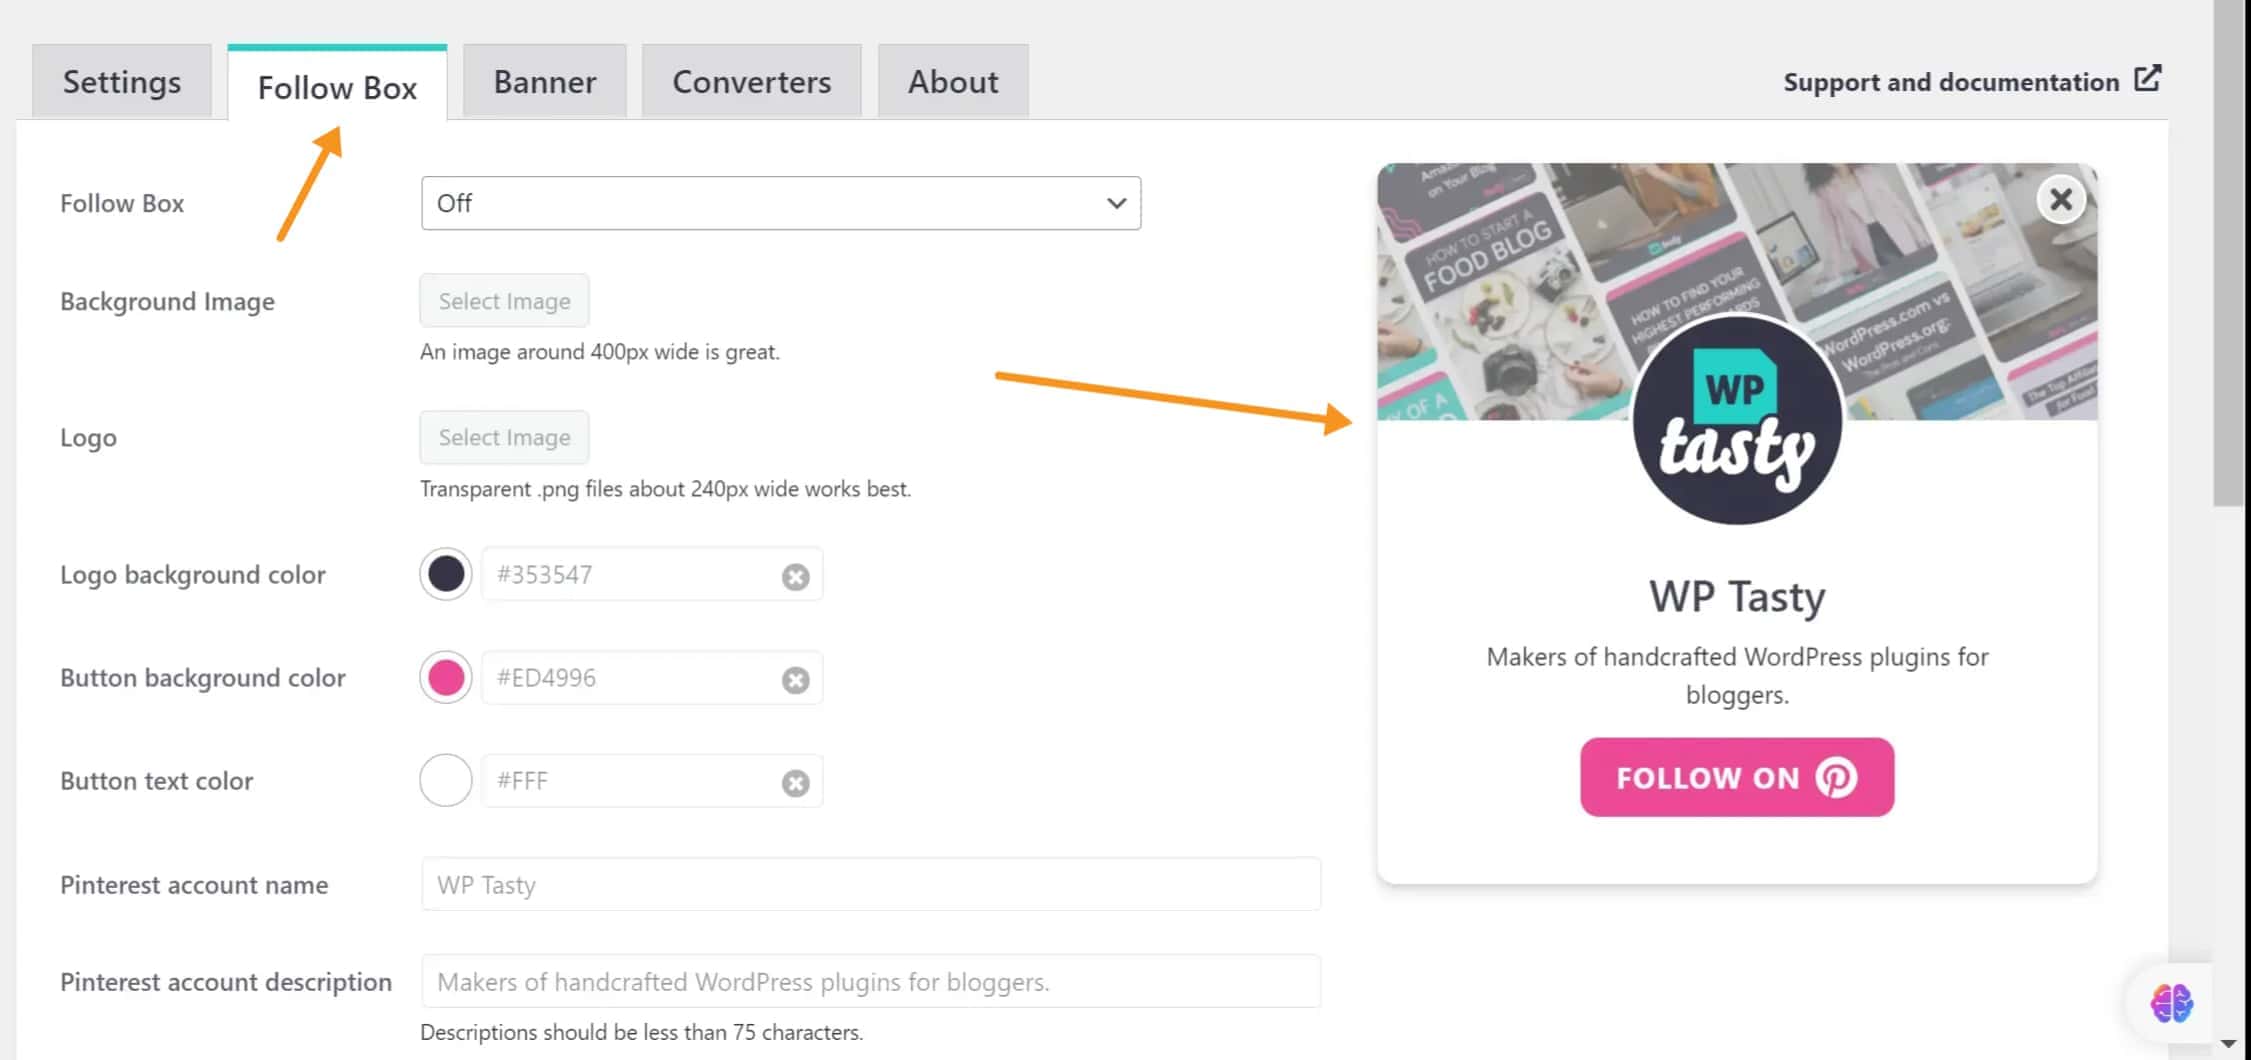
If you're looking to grow your Pinterest following, the 'Pinterest Follow Box' feature from Tasty Pins is just what you need.
It's a handy little widget that you can add to your blog.
What does it do? Well, after someone pins one of your images, this widget pops up and invites them to follow you on Pinterest. It's a simple way to keep the connection going.
6. Add a Pinterest Banner to Post Images
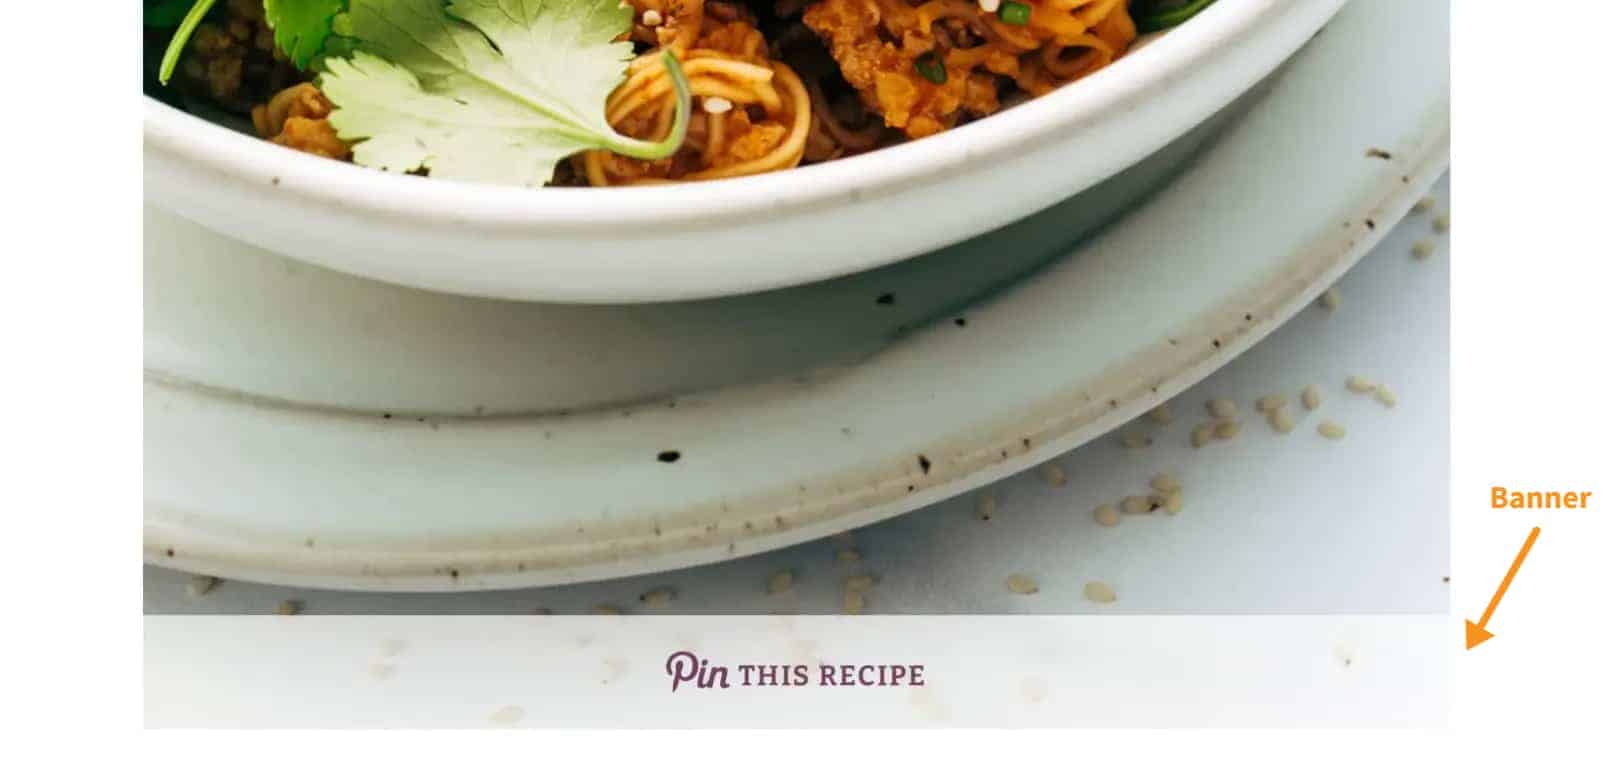
If you're looking to make your blog images more Pinterest-friendly, you're going to love this new feature.
It's all about making it super easy for your readers to pin your posts. Let's talk about the Pinterest banner that you can now add to your images.
It's a neat little strip that sits at the bottom of your first post image, and it's got a clear message prompting visitors to pin your post.
When someone clicks on this banner, a window pops up showing all the pinnable images from your post.
It's a handy way to encourage sharing without being pushy. Plus, it's customizable!
You can tweak the banner's background color and text to match your blog's style.
Whether you're sharing recipes, travel tips, or DIY projects, you can set the text to align with your content.
Just keep it short and sweet for mobile users.
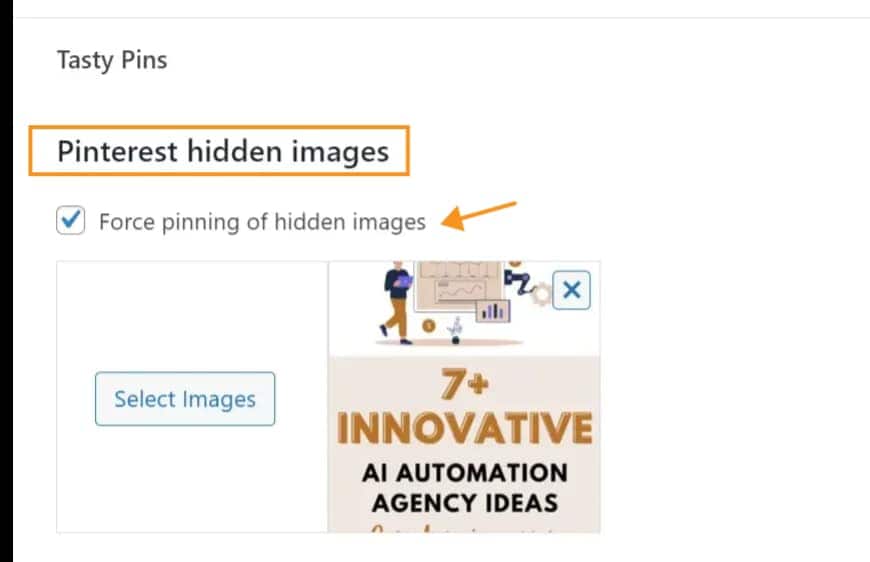
7. Force Pinning of Hidden Images
If you're serious about Pinterest, you know that not just any image will do. You need the right one with the right size to catch eyes and drive traffic back to your site.
That's where Tasty Pins steps in. It's a straightforward tool that lets you select which image gets shared when visitors pin to your page.
No more random images going out into the world of Pinterest. With Tasty Pins, you can 'force-pin' the image that best captures your content.
It's a subtle nudge to ensure the image you've put effort into creating is the one that gets noticed on Pinterest boards.
It's a practical feature, easy to use, and it gives you a bit more control over how your content is presented on social platforms.
8. Add Category Hidden Pins
Adding hidden pins to your blog's categories just got a whole lot easier with Tasty Pins.
Simply go to your categories, choose one, and you'll see a section for Tasty Pins right there.
In this block, you can upload the images you want to be associated with that particular category.
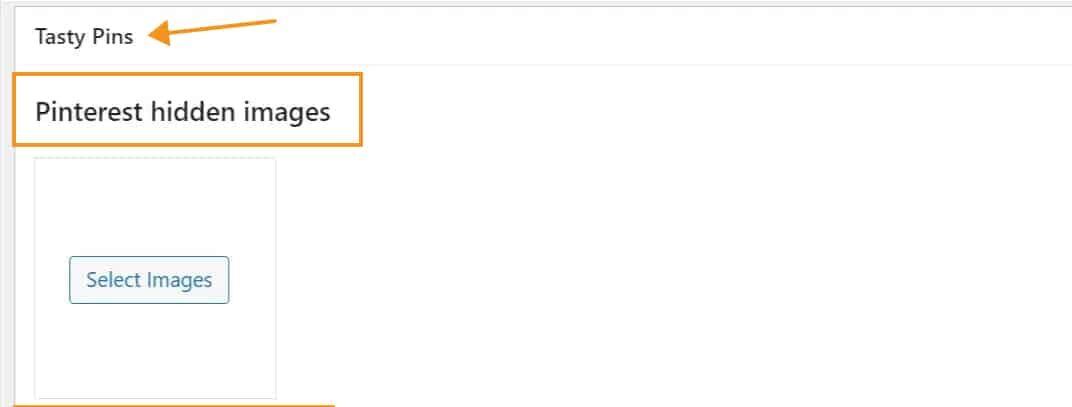
These won't clutter your blog visually, as they won't be visible in your posts, but they will be available for Pinterest.
It's a clever way to keep your blog's design clean while still capitalizing on Pinterest's traffic-driving capabilities.
But Tasty Pins doesn't stop there. For each hidden image, you can craft a Pinterest-friendly title and description, ensuring that when someone pins your image, it's optimized for the best possible engagement.
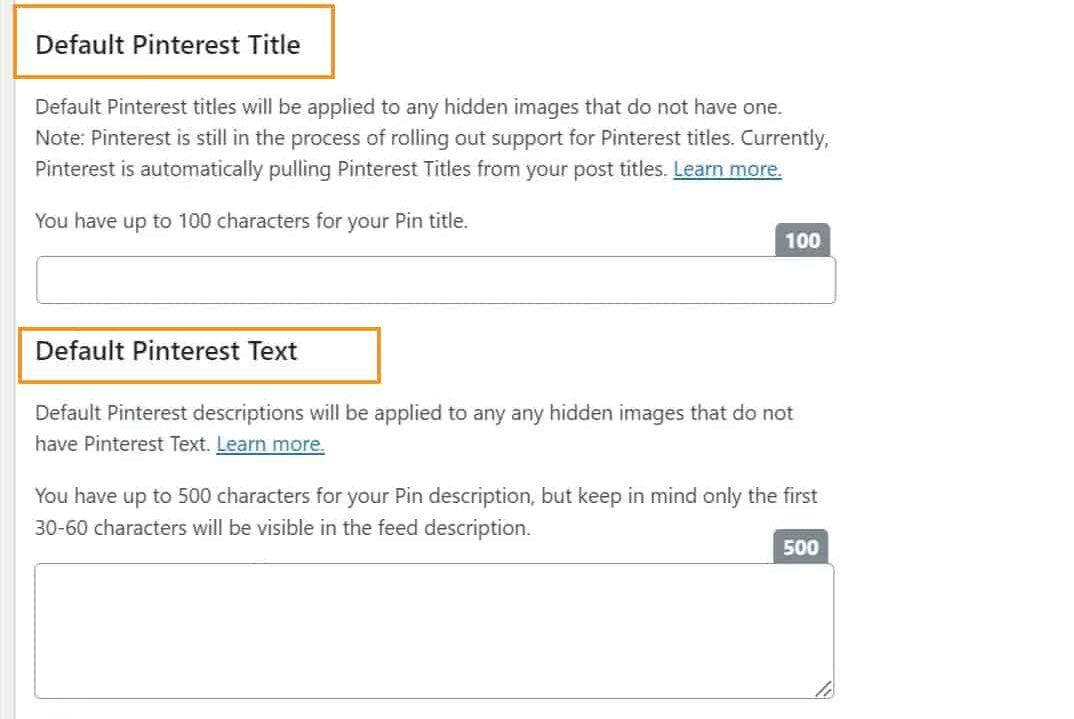
After you've made your selections and filled in the details, a simple update to the category page locks in your changes.
Now, when visitors come to your blog and decide to pin something from that category, they'll see these hidden images as options to pin.
Final Verdict: Is Tasty Pin Worth It?
In conclusion, after thoroughly testing WP Tasty Pins for this review, it's clear that it stands out as a user-friendly and efficient tool for bloggers who want to maximize their Pinterest presence.
The ability to easily set descriptions, insert keywords, and manage hashtags without diving into HTML is a game-changer.
It streamlines the process of making your images discoverable and engaging on Pinterest, which can significantly drive traffic to your blog.
If you're looking to enhance your Pinterest strategy with minimal effort and maximum impact, I recommend giving WP Tasty Pins a try.
It's a small investment that could lead to big returns in your blog's visibility and engagement.

Millie's Take
WP Tasty Pins has streamlined how I handle my blog's images, making Pinterest optimization a lot less complicated. It's a practical tool that delivers without any unnecessary frills. For anyone looking to simplify their image SEO, Tasty Pins is a solid choice.

